Traditional Focaccia Bread
Posted by admin on
A traditional focaccia bread recipe with tons of topping ideas that bakes up crisp on the outside and warm and soft on the inside. Perfect for serving with soups and stews, or even for making sandwiches.
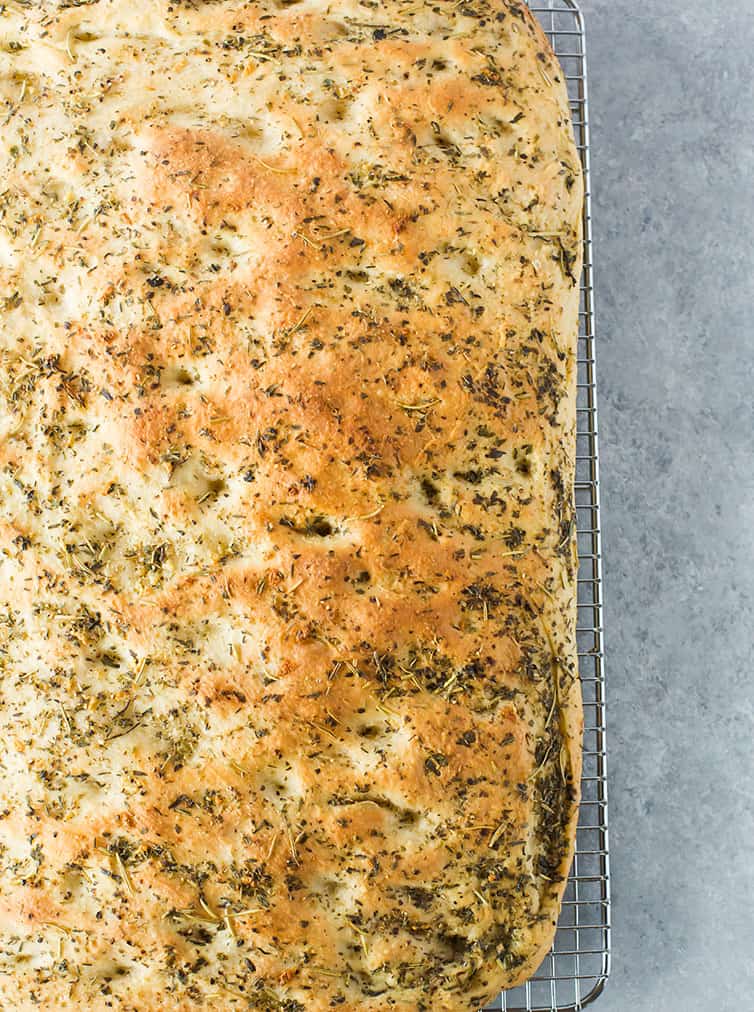
Welcome to the first BEB Bake-Along of 2020! Were going to flex our yeast muscles and make a delicious loaf of focaccia bread, which would be a fabulous accompaniment to all of the delicious soups and stews youre no doubt making this month. January is the unofficial month of warm comfort food, is it not?
Focaccia has always been one of my favorite bakery splurges, with the crusty exterior and soft interior, plus tons of flavor from the herbs and garlic are just heavenly. The traditional Italian bread can also double as a flatbread or pizza dough but is most commonly served as an appetizer bread or side to soup or salad.
No matter how you choose to serve it, I can promise you with 100% certainty that making it at home is a thousand times better than buying it somewhere. Lets do this!
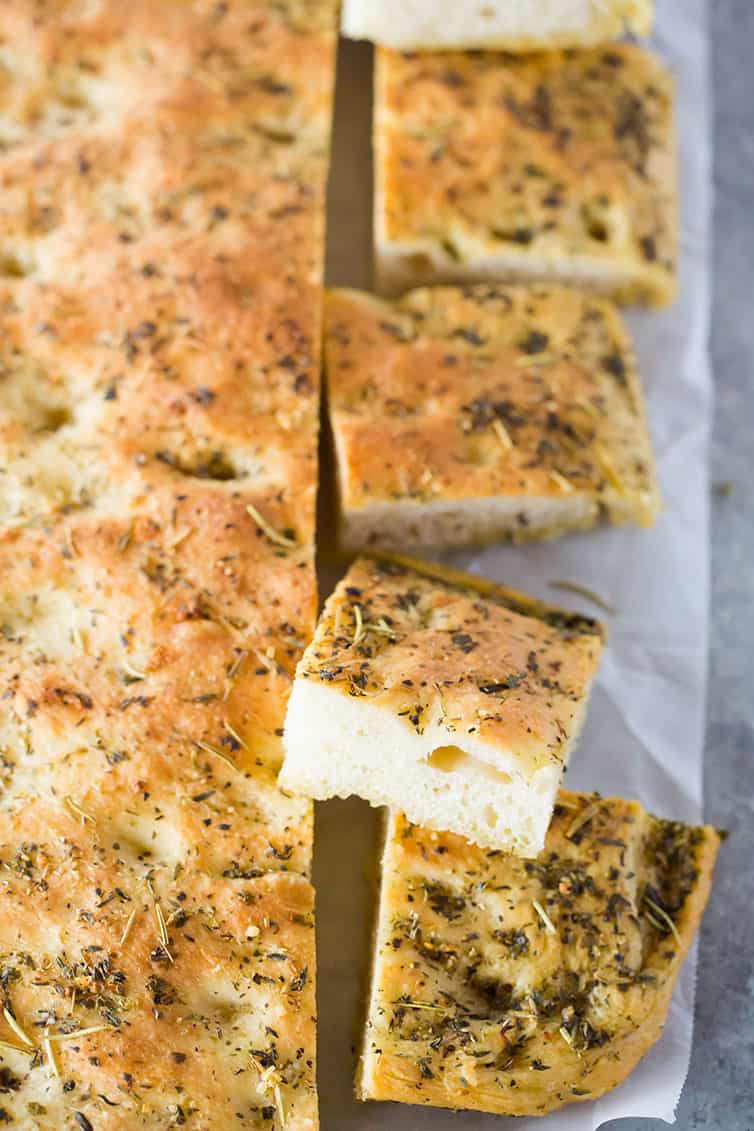
Ive tried many, many recipes and always come back to this classic from Peter Reinharts The Bread Bakers Apprentice. It bakes up perfectly every single time and is packed full of flavor. The olive oil creates a crisp exterior while the interior remains soft and fluffy.
When you look at this recipe, it will seem very time-intensive, but nearly all of the time is rest time with very little hands-on work. Lets talk through the recipe
How to Make Homemade Focaccia Bread
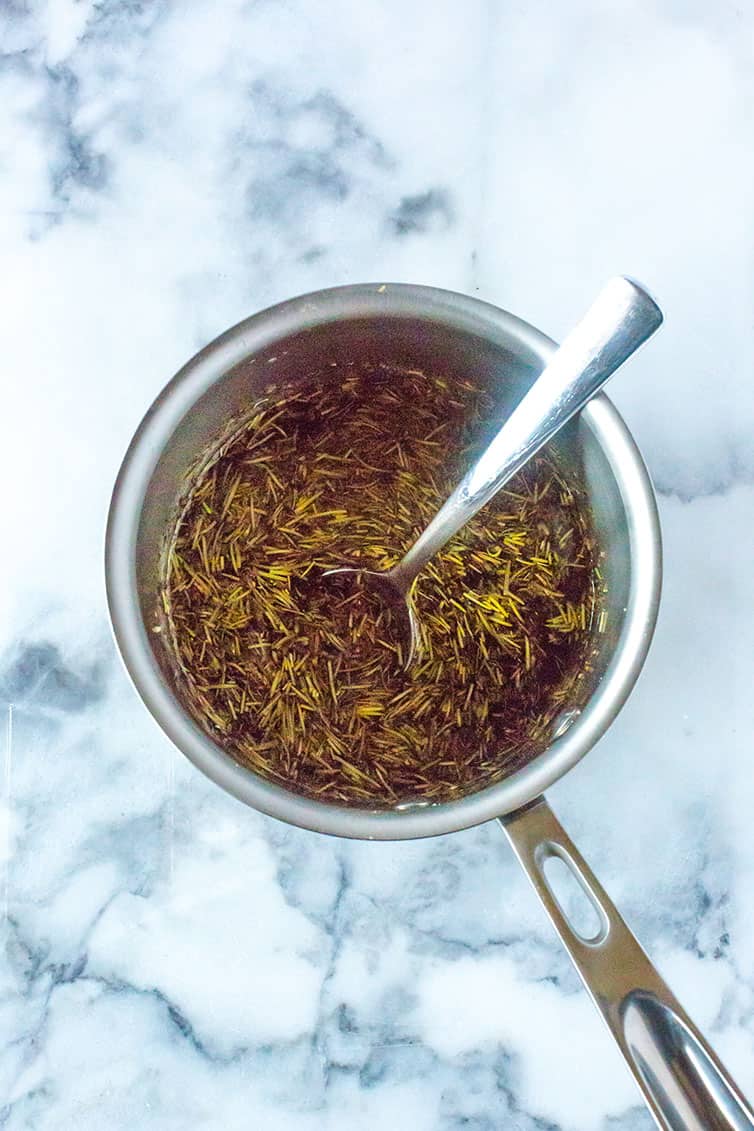
First things first make the herb oil! This is what infuses the bread with tons of flavor and gives it that characteristic texture. There are lots of flavor modifications and additions you can make to suit your tastes, so be sure to check the recipes notes below.
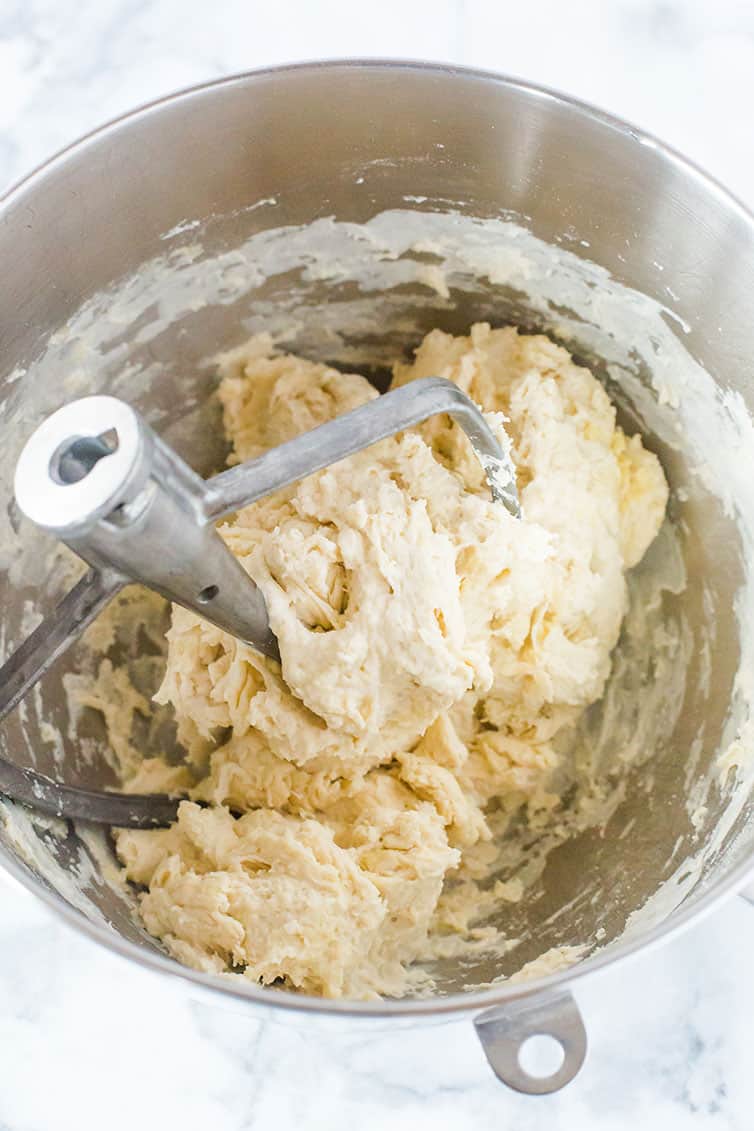
Now, lets make the dough! Its a simple dough comprised of just flour, yeast, salt, water, and olive oil. Youll mix it with a paddle attachment until it comes together and then knead until the dough clears the sides of the bowl.
An important note: this is meant to be a sticky dough; it should not be totally smooth, so dont worry if it doesnt clear the bottom of the bowl.
Fold, rest, fold again! This next series of steps only take a few minutes of hands-on time but requires a rest period in between each folding stint. You will first stretch the dough, then fold it into thirds, like a letter, allow it to rest, then repeat twice more.
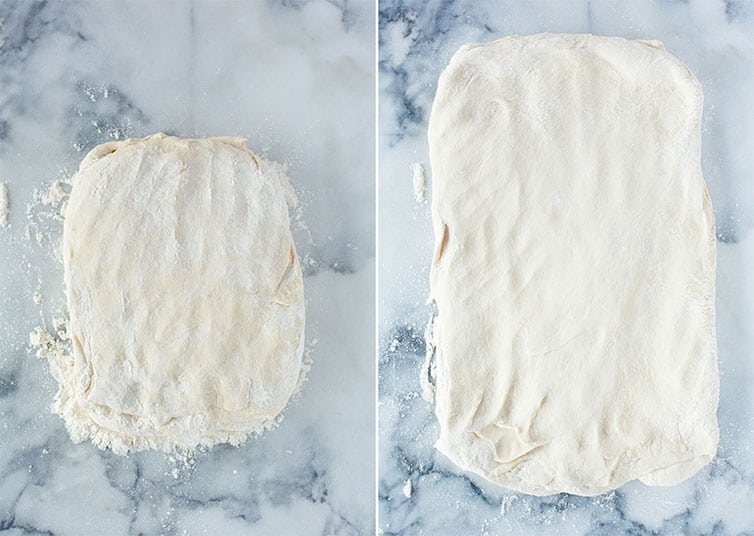

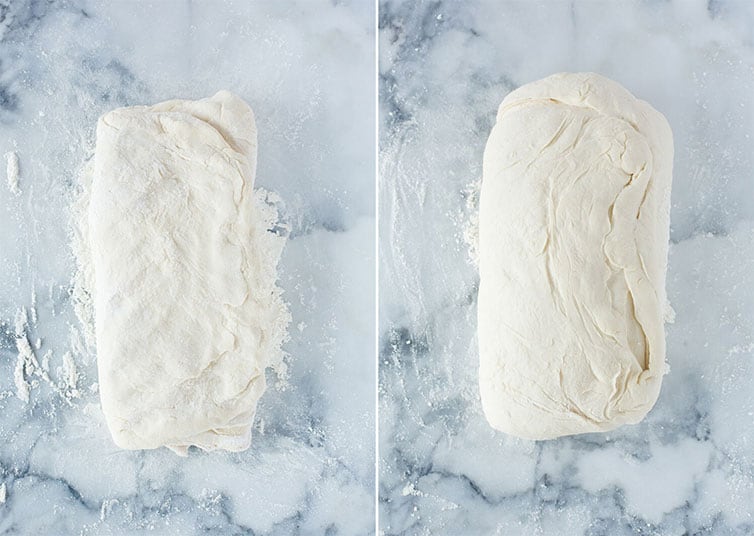
Oil and Dimple Once the dough has gone through its final rest period, youll spoon on half of the herb oil so that it covers the entire surface of the dough and use your fingertips to dimple the dough and spread it over the surface of the pan. It isnt necessary that it covers it completely, as once it goes through its final rise before the baking, the dough will puff and fill in the edges and corners.
At this point, the dough goes into the refrigerator overnight to rest and develop all of those amazing flavors and textures.
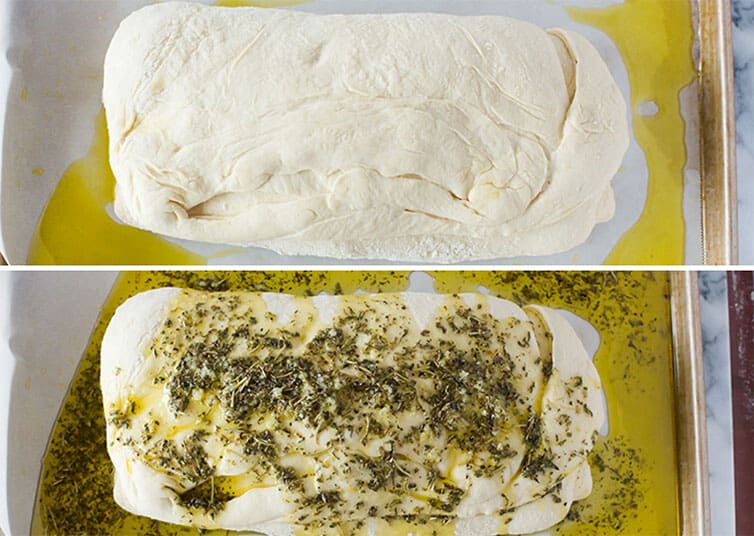
Rise and Shine! The next day, the dough should be removed from the refrigerator approximately 3 hours before you plan to bake it so that it has ample time to go through its final rise. First, youll pour on more herb oil and give it a final spread/dimpling and then let it do its thing until youre ready to bake.
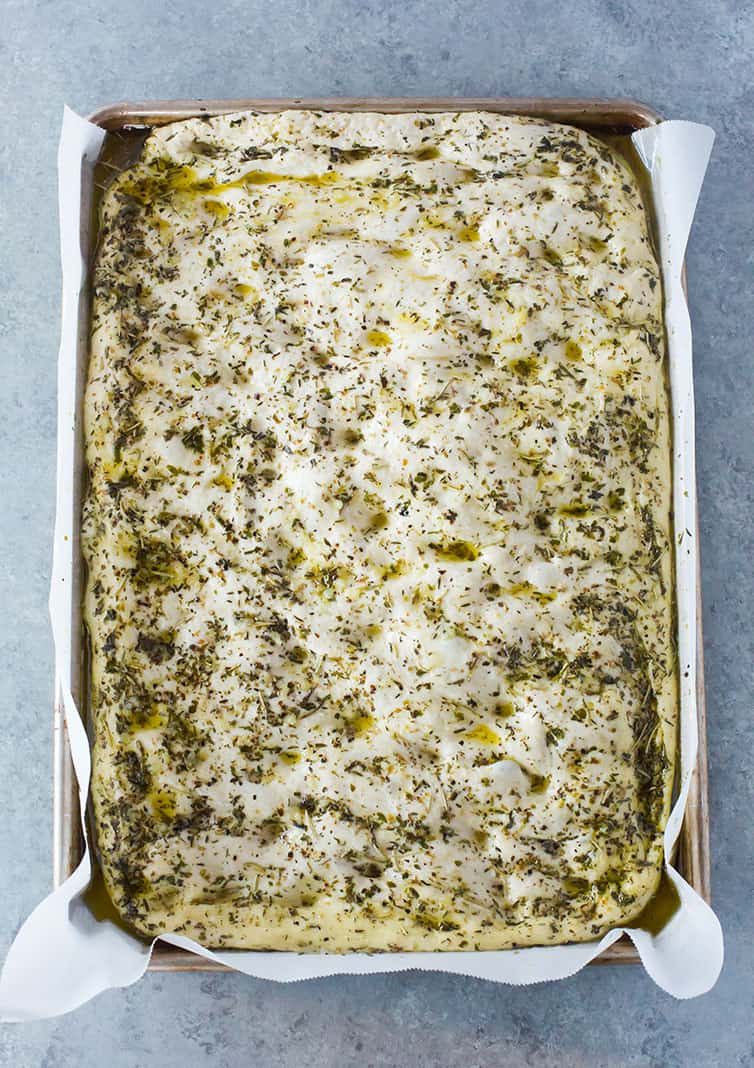
And then, at last, a beautiful, golden loaf of focaccia bread comes out of the oven.
This is absolutely the best when its eaten the same day that its baked, but you can keep it airtight at room temperature and continue to eat it for a few days, it just wont have the same crispness as it had fresh-baked. You could always revive it with a short stint in the oven or toaster oven.
Finally, Focaccia Bread Success Tips
Lots of tips and ideas below for embarking upon the focaccia bread journey:
- Herb Oil If using fresh herbs, use any combination of basil, parsley, oregano, tarragon, rosemary, thyme, cilantro, and sage. If using dried herbs, you can use a combination of any of the previous herbs, or use a blend such as herbes de Provence. You can substitute 1 tablespoon granulated garlic for the fresh garlic.
- Herb Oil Extras You can also add 1 teaspoon paprika, 1 teaspoon cayenne pepper, 1 tablespoon fennel seeds, 1 teaspoon onion powder, or 1 tablespoon dried, minced onions.
- Herb Oil Storage Keep any leftover herb oil in the refrigerator for up to 2 weeks (it makes a wonderful dipping oil!).
- Bread Flour Using bread flour gives the focaccia a chewy texture; you can substitute all-purpose flour without ruining the recipe, but your bread will be significantly lighter and missing that characteristic texture.
- Make the Dough By Hand The dough can be prepared without a stand mixer by mixing the dough with a large metal spoon in lieu of the kneading step. You will need to mix vigorously for about 3 to 5 minutes, or until the dough is smooth and the ingredients are evenly distributed.
- Gentle Dimpling When dimpling the dough, be sure to use ONLY your fingertips and not the flat of your hands to avoid tearing or ripping the dough.
-
Pre-Proof Topping Ideas:
-
- Sun-dried tomatoes
- Olives
- Roasted garlic
- Fresh herbs
- Walnuts, pine nuts, or other nuts
- Sauteed mushrooms, bell peppers, or onions
-
- Pre-Bake Topping Ideas:
-
-
- Soft cheeses Blue cheese, fresh mozzarella, and feta
- Cooked ground meat
- Strips of deli meat
- Coarse salt
- Coarse sugar
-
- During-Bake Topping Ideas:
-
-
- Dry or semihard cheeses Parmesan, Romano, regular mozzarella, Monterey Jack, Cheddar, and Swiss
-
- Freeze Before Baking If you wish to prepare the dough in advance, complete steps #1 through 7. After the 1 hour rise, wrap tightly in plastic wrap, place in a freezer-safe bag, and freeze for up to 3 months. Thaw overnight in the refrigerator, then proceed with the rest of the recipe.
- Freeze After Baking Wrap individual slices of focaccia in plastic wrap, then in foil, and place in a freezer-safe bag. Freeze for up to 1 month. Thaw at room temperature and, if desired, reheat in a 325-degree oven for 5 minutes, or until warmed through and crispy.
- Storage The focaccia is best the day it is made, but it can be stored, tightly covered, at room temperature for up to 2 days.
JOIN THE BEB BAKE-ALONG!
To tackle the focaccia bread and bake along with me this month, simply do the following:
- Make the focaccia!
- Snap a picture and either share it on social media (#BEBbakealong onInstagramorTwitter), upload it to theBEB Facebook group, or email it to me.
- Check-in on Instagram and Facebook throughout the month to see everyones focaccia!
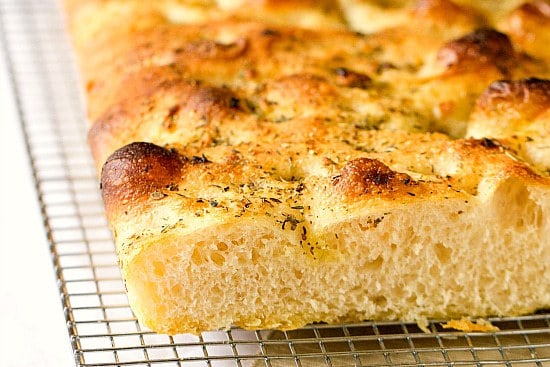
Focaccia Bread
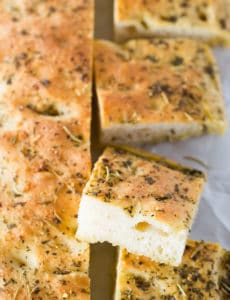
A traditional focaccia bread recipe with tons of topping ideas that bakes up crisp on the outside and warm and soft on the inside. Perfect for serving with soups and stews, or even for making sandwiches.
For the Herb Oil:
- 2 cups olive oil
- 1 cup chopped fresh herbs (OR 1/3 cup dried herbs)
- 1 tablespoon kosher salt
- 1 teaspoon ground black pepper
- 6 cloves garlic (minced)
For the Dough:
- 5 cups high-gluten or bread flour
- 2 teaspoons salt
- 2 teaspoons instant yeast
- 6 tablespoons olive oil
- 2 cups water (at room temperature)
For Preparation
- cup olive oil
- Pre-proof toppings (optional)
- Pre-bake toppings (optional)
- During-bake toppings (optional)
-
Make the Herb Oil: Warm 2 cups olive oil in a small saucepan over low heat to 100 degrees F (this only takes a few minutes). Add the herbs, salt, pepper, and garlic; stir together, remove from the heat and allow to steep while you prepare the dough.
-
Make the Dough: Stir together the flour, salt, and yeast in the bowl of an electric mixer. Add the oil and water and mix on low speed with the paddle attachment until all of the ingredients form a wet, sticky ball.
-
Switch to the dough hook and mix on medium speed for 5 to 7 minutes, or as long as it takes to create a smooth, sticky dough. The dough should clear the sides of the bowl but stick to the bottom of the bowl. You may need to add additional flour to firm up the dough enough to clear the sides of the bowl, but the dough should still be quite soft and sticky.
-
Sprinkle enough flour on a clean work surface to make a bed about 6 inches square. Using a dough spatula or bench scraper dipped in water, transfer the sticky dough to the bed of flour and dust liberally with flour, patting the dough into a rectangle. Allow the dough to rest for 5 minutes.
-
Coat your hands with flour and stretch the dough from each end to twice its size. Fold it, letter style, over itself to return it to a rectangular shape. Mist the top of the dough with spray oil or nonstick cooking spray, again dust with flour, and loosely cover with plastic wrap. Allow the dough to rest for 30 minutes.
-
Stretch and fold the dough again; mist with oil, dust with flour, and cover loosely with plastic wrap. Allow the dough to rest for 30 minutes.
-
Once more, stretch and fold the dough. Cover loosely with plastic wrap and allow to ferment on the work surface for 1 hour. It should swell but not necessarily double in size.
-
Line a half sheet pan with parchment paper. Drizzle cup olive oil over the paper, and spread it with your hands or a brush to cover the surface. Lightly oil your hands and, using a plastic dough spatula or bench scraper, lift the dough from the work surface and transfer it to the sheet pan, maintaining the rectangular shape as much as possible. Spoon half of the herb oil over the dough.
-
Use your fingertips to dimple the dough and spread it to fill the pan. If the dough becomes too springy, let it rest for 15 minutes and then continue dimpling. Dont worry if you arent able to completely fill the pan, especially the corners. User more herb oil as needed to ensure that the entire surface is coated with oil.
-
Loosely cover the pan with plastic wrap and refrigerate overnight (or up to 3 days).
-
Remove the pan from the refrigerator 3 hours before baking.
-
Drizzle additional herb oil over the surface and dimple it in (you can use all of the herb oil if you want; the dough will absorb it even though it looks like a lot). The pan should be filled completely with the dough and the dough should have a thickness of about -inch. Add any other pre-proof toppings (see notes below). Cover the pan with plastic wrap and proof at room temperature for 3 hours, or until the dough double in size, rising to a thickness of nearly 1 inch.
-
Preheat oven to 500 degrees F. Gently place any pre-bake toppings on the dough (see notes below).
-
Place the pan in the oven. Immediately lower the oven temperature to 450 degrees F and bake for 10 minutes. Rotate the pan 180 degrees and continue baking for 5 to 10 minutes, or until it begins to turn a light golden brown. If you are using any during-bake toppings (see notes below), sprinkle them on at this point and continue baking an additional 5 minutes or so. The internal temperature of the dough should register at least 200 degrees F on an instant-read thermometer.
-
Remove the pan from the oven and immediately transfer the focaccia out of the pan onto a cooling rack. Allow the focaccia to cool for at least 20 minutes before slicing or serving.
- Herb Oil If using fresh herbs, use any combination of basil, parsley, oregano, tarragon, rosemary, thyme, cilantro, and sage. If using dried herbs, you can use a combination of any of the previous herbs, or use a blend such as herbes de Provence. You can substitute 1 tablespoon granulated garlic for the fresh garlic.
- Herb Oil Extras You can also add 1 teaspoon paprika, 1 teaspoon cayenne pepper, 1 tablespoon fennel seeds, 1 teaspoon onion powder, or 1 tablespoon dried, minced onions.
- Herb Oil Storage Keep any leftover herb oil in the refrigerator for up to 2 weeks (it makes a wonderful dipping oil!).
- Make the Dough By Hand The dough can be prepared without a stand mixer by mixing the dough with a large metal spoon in lieu of the kneading step. You will need to mix vigorously for about 3 to 5 minutes, or until the dough is smooth and the ingredients are evenly distributed.
- Gentle Dimpling When dimpling the dough, be sure to use ONLY your fingertips and not the flat of your hands to avoid tearing or ripping the dough.
-
Pre-Proof Topping Ideas:
-
- Sun-dried tomatoes
- Olives
- Roasted garlic
- Fresh herbs
- Walnuts, pine nuts, or other nuts
- Sauteed mushrooms, bell peppers, or onions
-
-
Pre-Bake Topping Ideas:
-
- Soft cheeses Blue cheese, fresh mozzarella, and feta
- Cooked ground meat
- Strips of deli meat
- Coarse salt
- Coarse sugar
-
-
During-Bake Topping Ideas:
-
- Dry or semihard cheeses Parmesan, Romano, regular mozzarella, Monterey Jack, Cheddar, and Swiss
-
- Freeze Before Baking If you wish to prepare the dough in advance, complete steps #1 through 7. After the 1 hour rise, wrap tightly in plastic wrap, place in a freezer-safe bag, and freeze for up to 3 months. Thaw overnight in the refrigerator, then proceed with the rest of the recipe.
- Freeze After Baking Wrap individual slices of focaccia in plastic wrap, then in foil, and place in a freezer-safe bag. Freeze for up to 1 month. Thaw at room temperature and, if desired, reheat in a 325-degree oven for 5 minutes, or until warmed through and crispy.
- Storage The focaccia is best the day it is made, but it can be stored, tightly covered, at room temperature for up to 2 days.
[Recipe from The Bread Bakers Apprentice]
The post Traditional Focaccia Bread appeared first on Brown Eyed Baker.
