

Homemade Blueberry Pie
Posted by admin on
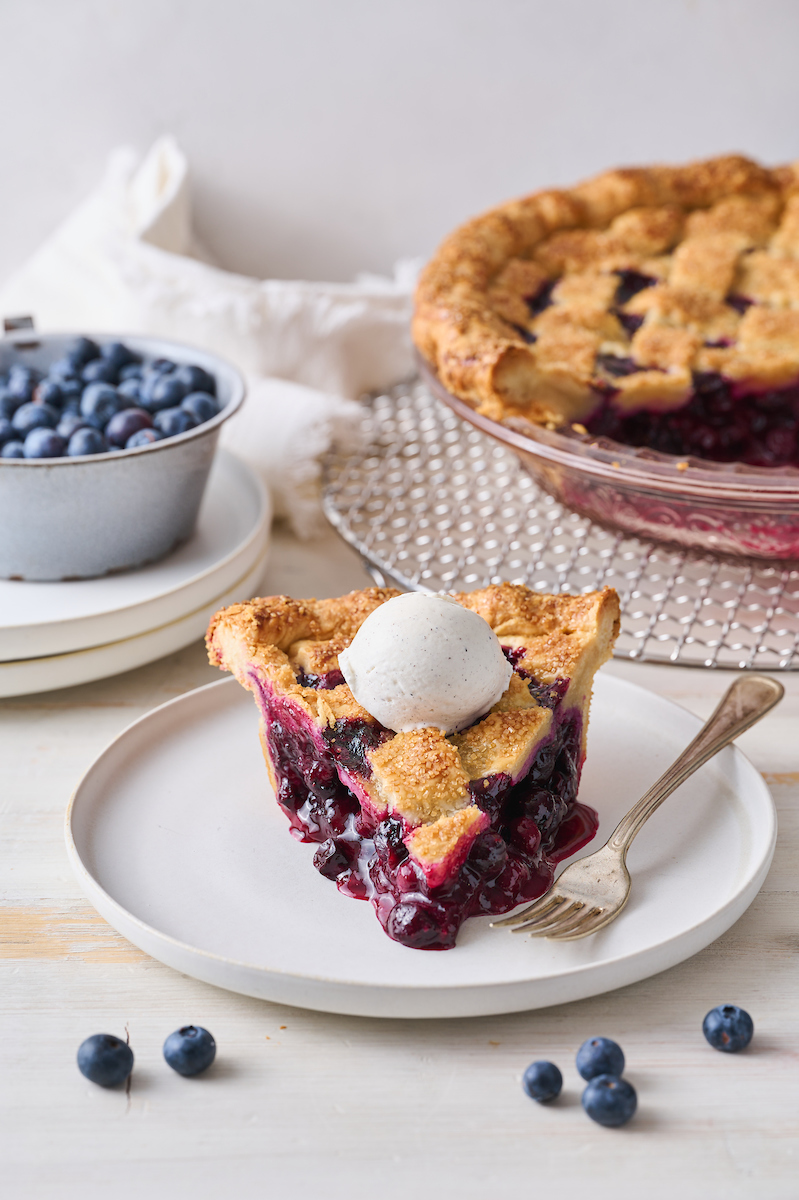
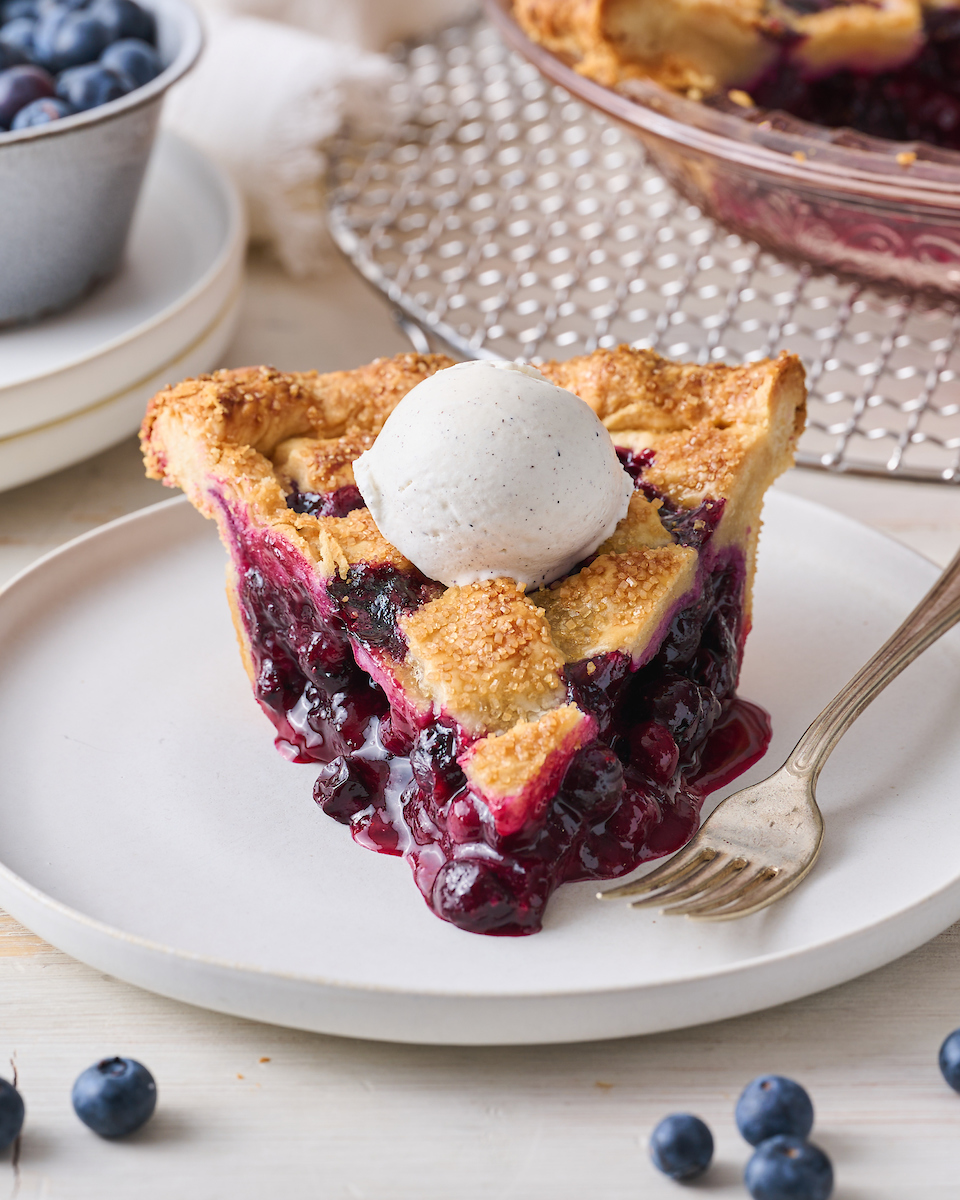
Nothing says “it’s Summer!” quite like homemade blueberry pie topped with vanilla ice cream! Fresh or frozen berries will work, but I prefer fresh. So bust out your rolling pin and let’s bake the pie!

Blueberry Pie Recipe
One of our friends bought Remi a book called ‘Jamberry’ and it’s seriously the cutest little book ever. It’s about a little boy and a bear who embark on a berry picking adventure and I’ve probably read it 200 times. No lie – I have the entire thing memorized. And every time I’m done reading it, I find myself dreaming about berry pies!
More specifically, blueberry pie! My absolute favorite… but only if it’s homemade.
 I don’t know why, but I can’t seem to find a decent store-bought blueberry pie to save my life. They’re either super soupy or too thick and gloopy and sickly sweet. Or! They’re a lemon blueberry pie because they’re loaded with tons of lemon juice and lemon zest, which to me isn’t a true blueberry pie.
So given how picky I am, I obviously had to hunker down and create a perfect-to-me blueberry pie recipe! I’m absolutely head over heels in love with this version, and I think you’re going to love it, too! It’s lightly spiced and flavored, key word being LIGHTLY, because I really wanted to let the blueberries shine!!!
Blueberry Pie Filling
- Blueberries: Fresh or frozen will do! But if you’re using frozen, DO NOT THAW THEM! I also don’t recommend swapping traditional blueberries for wild blueberries. But if you want to combine them, you can swap out 1 cup of the traditional blueberries for wild blueberries. Just toss them in the large bowl with the rest of the filling (don’t boil them down).
- Granulated Sugar: Adds just the right amount of sweetness! I do not suggest reducing the amount or swapping it for any other variety of sugar.
- Light Brown Sugar: But dark brown sugar will work in a pinch! It’ll just add slightly more flavor. Adding brown sugar adds a nice depth of flavor to the pie, which I love!
- Lemon Juice: Buy a fresh lemon and use it! Bottled juice never tastes as fresh.
- Cornstarch: Our thickener! Please don’t be tempted to reduce this amount or use a different thickener, as the filling won’t set properly.
- Cinnamon: Don’t worry about this adding too much flavor or spice! It just helps the filling not be too “one note”.
- Ground Allspice: Ditto what I said above! I hope you don’t skip this ingredient because it really makes the filling so delicious.
- Salt: This won’t make your filling taste salty! It just balances out the sweetness, which we want.
- Pure Vanilla Extract: I know it’s pricey, but I highly suggest using the real thing and not imitation vanilla here.
- Butter: Adds richness and flavor! I suggest unsalted, but if all you have if salted, go ahead and use it. Simply omit the salt called for.
Homemade Pie Crust Recipe
My homemade recipe makes enough dough for the top crust and the bottom crust! And it’s made with basic kitchen staples. So, what could go wrong? Well, a few things! So here are a few tips:
- Make sure your butter is cold, cold, COLD! I actually suggest you pop your sticks of butter into the freezer for 20 minutes (30 minutes if you have the time) or so before working the butter into the dough. This is because fridge chilled butter can come to room temperature and start melting very quickly, and we don’t want that!
- Keep everything cold! And be sure to chill the rolled out pie dough and lattice strips before using.
- Don’t use too much water! Your dough should barely come together when you’re kneading it. I suggest adding a little bit of water at a time and kneading it well before adding more. Too much water will cause a very gluey doughy pie crust. Yuck!
- Make an egg wash and generously crush it over the top of the pie crust. When brushed on the top, the egg wash will help create a gorgeous golden brown color that makes your pie look like it came from a fancy bakery!
- Crimp the edges! This not only helps secure the edges, but makes the pie look so pretty!
- If you’re struggling to roll the dough out, let it rest a little longer before trying again. Cold dough will crack! So while I suggest letting it rest for 15 to 20 minutes, you may need to wait a little longer depending on the temperature of your kitchen.
You can make the dough in advance and pop it in the fridge for up to 2 days! And you might as well do it this way, because the dough needs to chill for at least 2 hours before being rolled out. But I find it’s best and easiest to work with the next day.
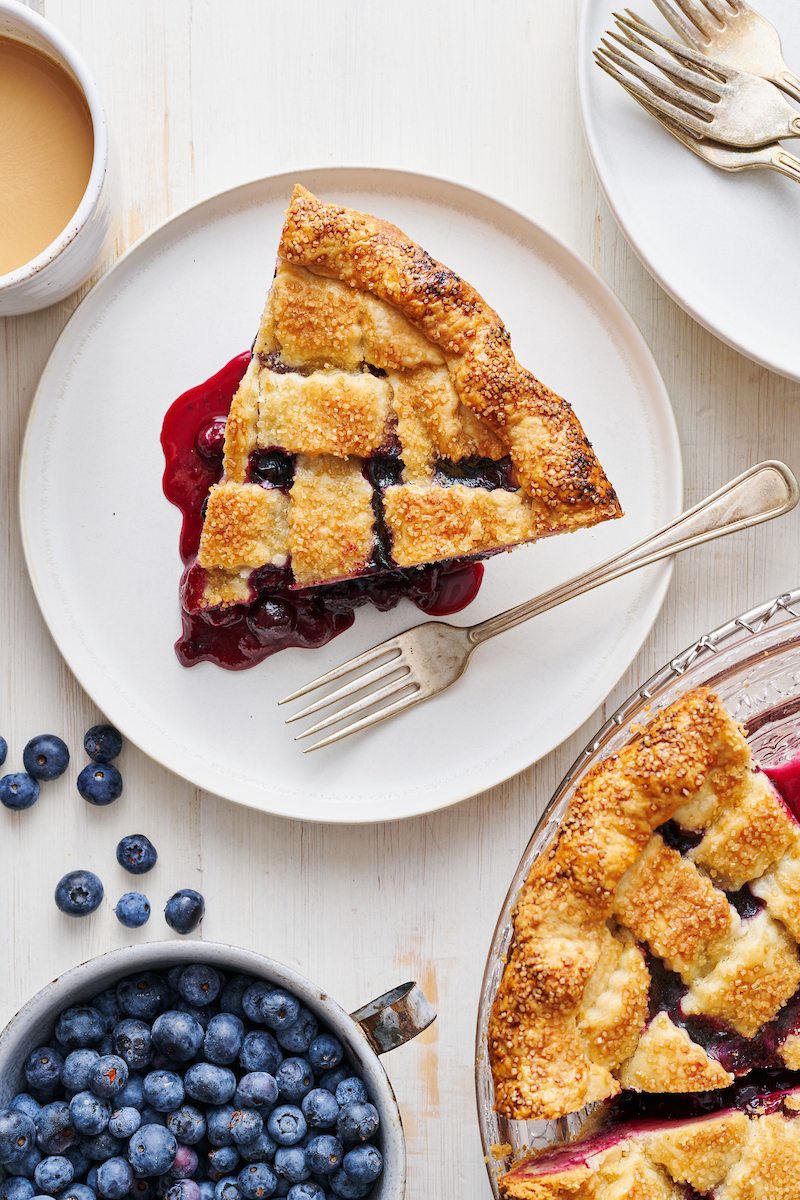
How to Cut Pretty Pieces
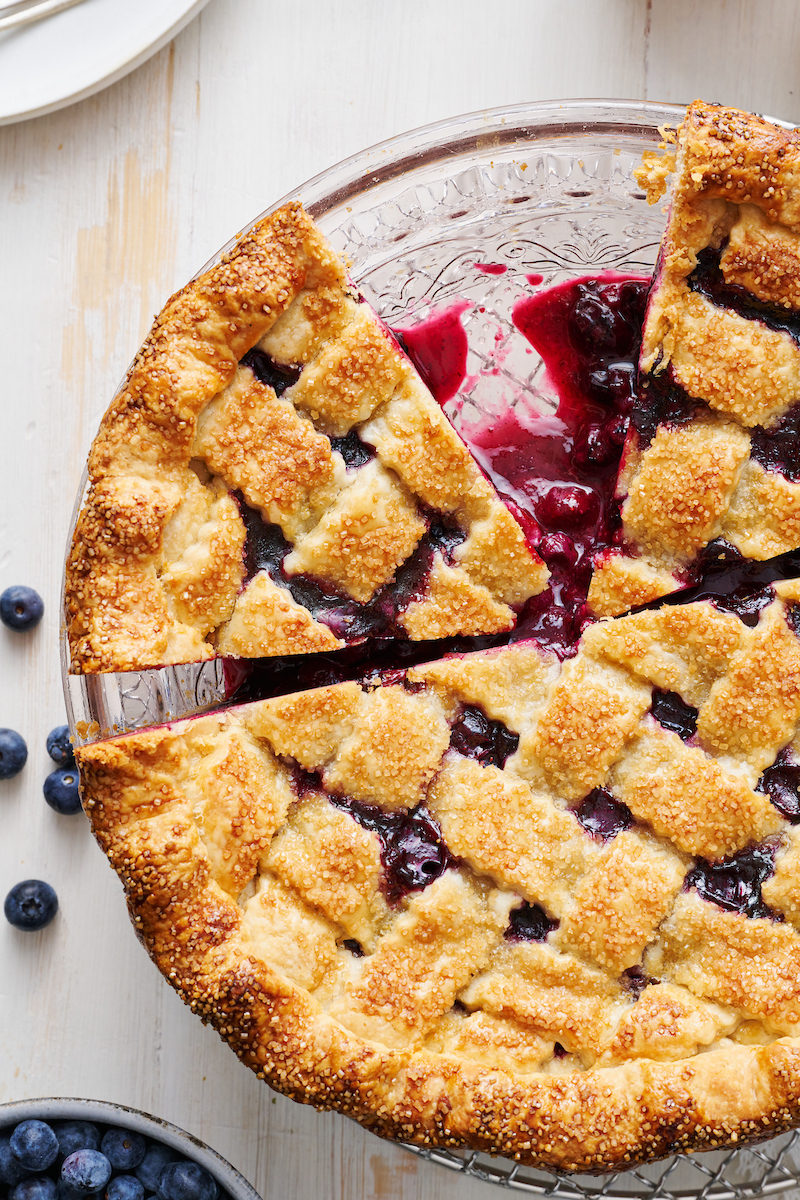
There’s not beating around the bush… the best way to cut pretty neat pieces of pie is by chilling the pie well before slicing! I suggest 4 hours as the minimum, but you can chill overnight for an extra well set pie.
Next time you’re craving blueberry pie, skip the store-bought and try this recipe! I know it looks like a lot of work… and honestly, it is! But it can be broken up over a few days. You can make the pie crust in advance and store it in the fridge for up to 48 hours. Then just roll it out and make the filling the day of!
Serve with ice cream and enjoy!

More Blueberry Pie Recipes:
- Blueberry Hand Pies
- Blueberry Hand Pies with Lemon Poppy Seed Crust
- Blueberry Pie Fudge
- Blueberry Bourbon Hand Pies

Homemade Blueberry Pie
Ingredients
For the Crust:
- 5 cups (600 g) all purpose flour
- 1/4 cup (57 g) sugar
- 1/2 teaspoon salt
- 2 cups (454 g) unsalted butter very cold
- 3/4 cup (170 ml) ice water more only if needed
For the Blueberry Pie Filling:
- 2 pounds (794 g) fresh or frozen blueberries if using frozen, do NOT thaw
- 1/3 cup (71 g) light brown sugar packed
- 2 Tablespoons (28 ml) freshly squeezed lemon juice
- 4 Tablespoons (44 g) cornstarch divided
- 2/3 cup (132 g) granulated sugar
- 1/2 teaspoon ground cinnamon
- 1/4 teaspoon ground allspice
- 1/4 teaspoon salt
- 1 and 1/2 Tablespoons (21 ml) pure vanilla extract
- 2 Tablespoons (28 g) unsalted butter
For the Egg Wash:
- 1 large egg
- 1 and 1/2 teaspoons water
- 1/4 cup (50 g) sparkling sugar
Instructions
For the Crust:
- In a large bowl, mix together the flour, sugar, and salt. Add in the cubed butter and toss with a spatula to coat the butter in the flour.
- Using a pastry cutter, work the butter into the flour until the mixture is a coarse meal. The butter should be about the size of peas.
- Using a silicone spatula, slowly blend in just enough ice water to form moist clumps.
- Pour the shaggy dough out onto a clean surface and knead it gently, until it comes together in a ball, adding more ice water only if absolutely needed.
- Gather the dough into a large ball and divide it in half (you can use a kitchen scale if you want each side to weigh the same, each half should weigh about 644 grams, depending on how much water is used). Gently flatten each half into a disk.
- Wrap the disks in plastic wrap and place in the refrigerator to chill for at least 2 hour, or up to 24 hours.
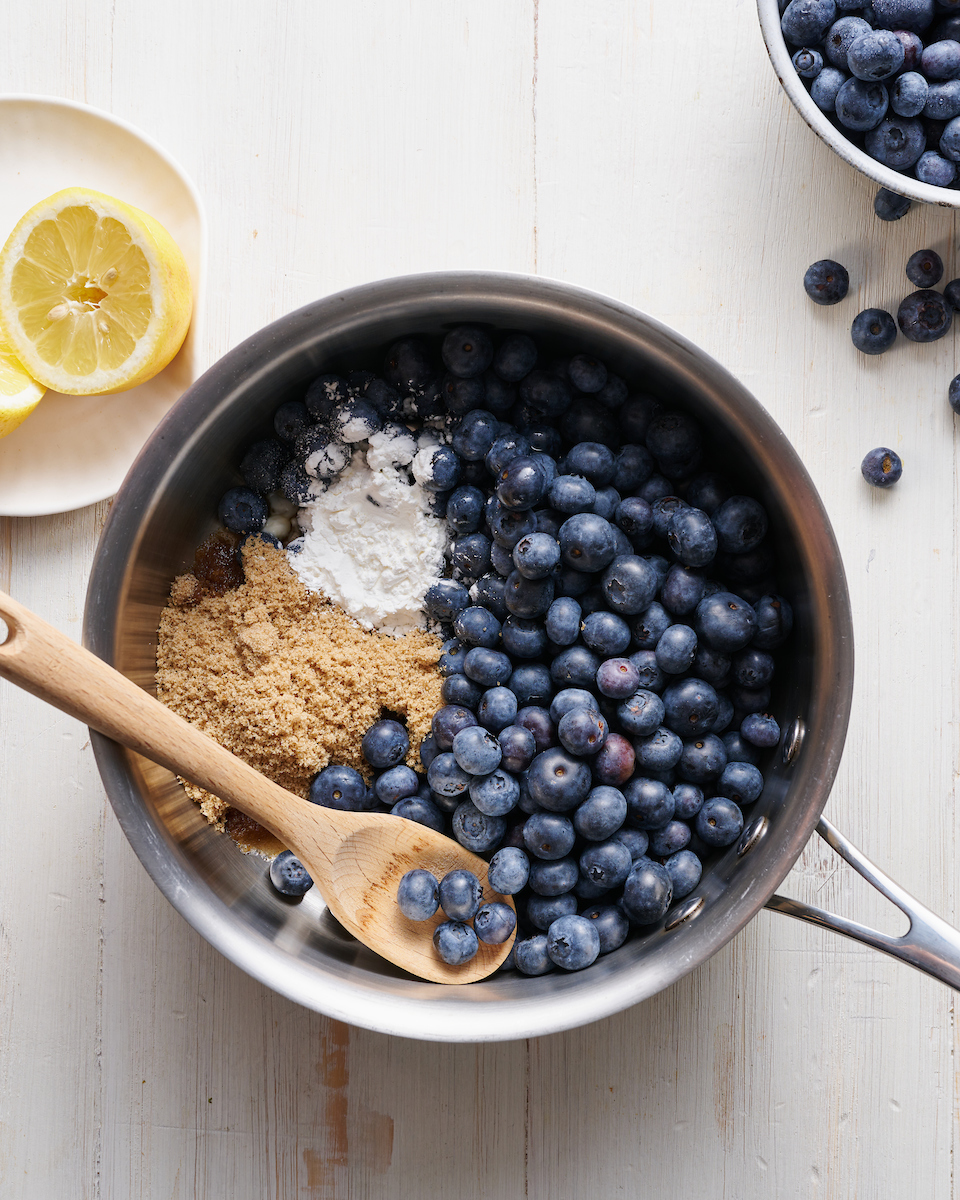
For the Blueberry Pie Filling:
- In a medium saucepan, combine the 1 pound (397 g) of the blueberries, light brown sugar, lemon juice, and 1 Tablespoon (11 grams) of the cornstarch. Place the pan over medium-high heat and bring to a simmer, stirring almost constantly, and cook just until the mixture starts to thicken, about 7 to 8 minutes.
- Reduce heat to low and cook for another 2 minutes before removing from heat.
- Transfer to a large heatproof bowl and stir in the remaining blueberries (397 g), granulated sugar, cinnamon, salt, allspice, vanilla, butter, and remaining cornstarch. Mix well to evenly combine, then set aside to cool completely before using.
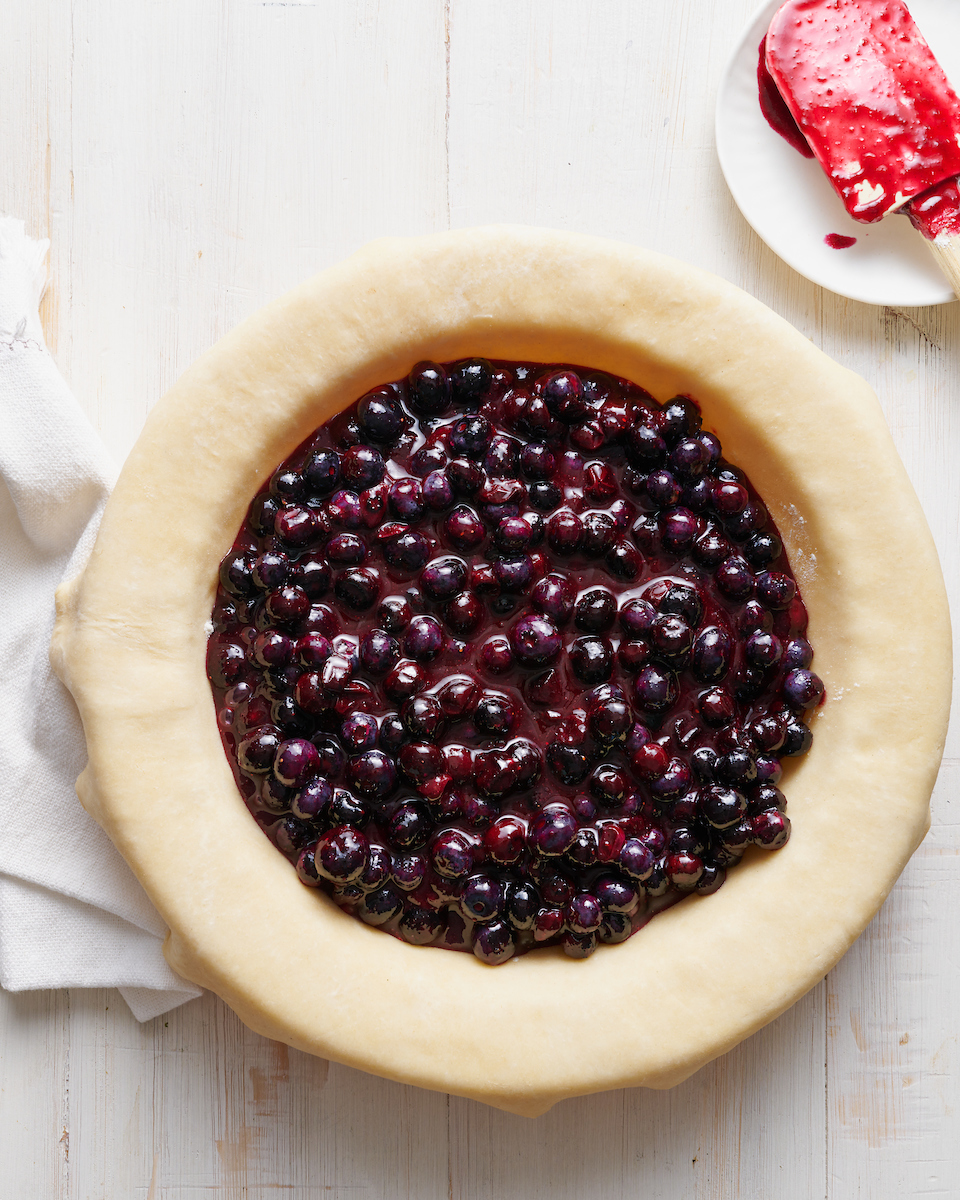
Prepare the Bottom Crust:
- Remove one disk of the dough from the fridge 15 minutes before you plan on rolling, as dough that is too cold will crack.
- Lightly flour a rolling pin and a large clean work surface. Set the dough in the middle of the work surface and - beginning from the center of the disc - roll the dough away from you in one firm and even stroke. After each stroke, rotate the disc a quarter turn clockwise and roll again. Lightly sprinkle more flour on the work surface, pie dough, and rolling pin as needed. You want to use just enough to prevent the dough from sticking. As your disc of dough becomes larger, be sure not to overstretch the center of the dough. Continue rolling until the dough is about 16-inches in diameter, and around a 1/4" in thickness.
- Carefully fold the dough in half and lay it across one side of a 9-inch pie pan, placing the seam of the dough in the center of the pan.
- Gently unfold the crust, then use your hands to fit the dough down into the pan, making sure there are no gaps between the dough and the sides of the pan. If you see any visible air bubbles, gently burst them with a fork.
- Using kitchen scissors, trim the dough overhang to 1 and 1/2 inches, measuring from the inner rim of the pan.
- Lightly cover the crust with plastic wrap and place back in the refrigerator until needed, at least 20 minutes.
Prepare the Lattice Crust:
- Remove the second disk of the dough from the fridge and let it sit at room temperature for 15 minutes before you plan on rolling. Remember, dough that’s too cold will crack.
- Line a large baking sheet with parchment paper and set it aside until needed.
- Lightly flour a rolling pin and a large clean work surface. Set the dough in the middle of the work surface and - beginning from the center of the disc - roll the dough away from you in one firm and even stroke. After each stroke, rotate the disc a quarter turn clockwise and roll again. Lightly sprinkle more flour on the work surface, pie dough, and rolling pin as needed. You want to use just enough to prevent the dough from sticking. As your disc of dough becomes larger, be sure not to overstretch the center of the dough. Continue rolling until the dough is about 16-inches in diameter, and around a 1/4" in thickness.
- Using a pizza cutter or pastry roller, slice the dough into 12 strips (the width of the strips should be just over an inch). Gently lay the strips on the prepared baking sheet, cover with plastic wrap, and refrigerate until needed, at least 20 minutes.
Prepare the Egg Wash:
- In a small bowl combine the egg and water, whisk until well combined.
Assembly and Baking:
- Preheat the oven to 425 degrees (F).
- Remove the prepared crust and lattice strips from the refrigerator.
- Sprinkle the bottom of the pie crust with 1 teaspoon of flour. Then, using a rubber spatula, scrape the blueberry pie filling into an even layer in the pie crust shell.
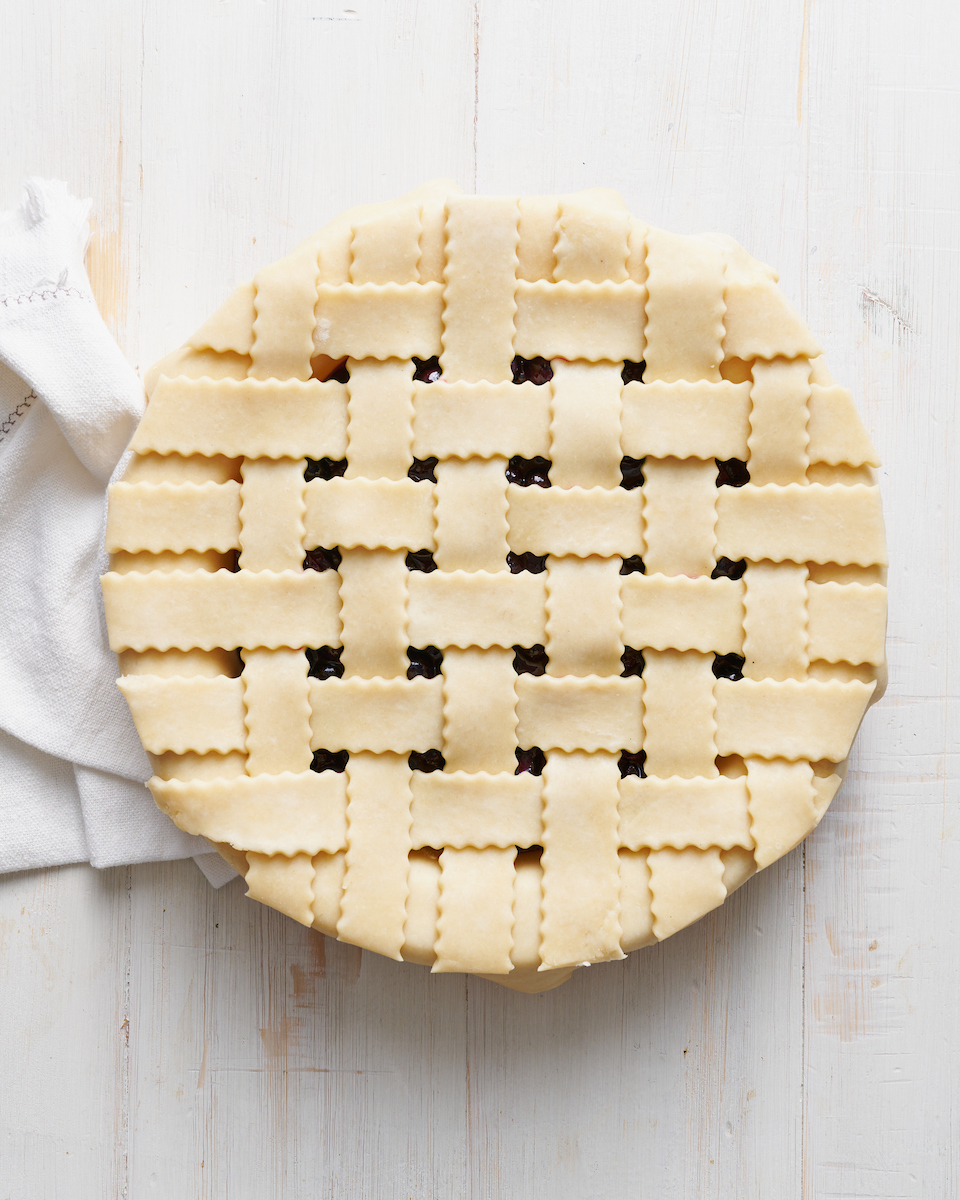
- Lay 7 of the strips parallel on top of the filling, leaving about 1/4-inch between each strip. Fold back the second, fourth, and sixth strip, then place a strip of dough so that it’s perpendicular to the parallel strips. Unfold the folded strips, so they lay over the perpendicular strip.
- Now fold back the first, third, fifth, and seventh strip, then place another strip of dough on top, so that it’s perpendicular to the parallel lattice strips.
- Repeat this layering process with remaining lattice strips, weaving the strips over and under each other.
- Trim the edges of the strips, leaving about 1/2 inch overhang. Tightly roll the excess dough up so it's firmly sitting on the edge of the pie plate, then crimp the edges to secure the strips with the bottom pie crust.
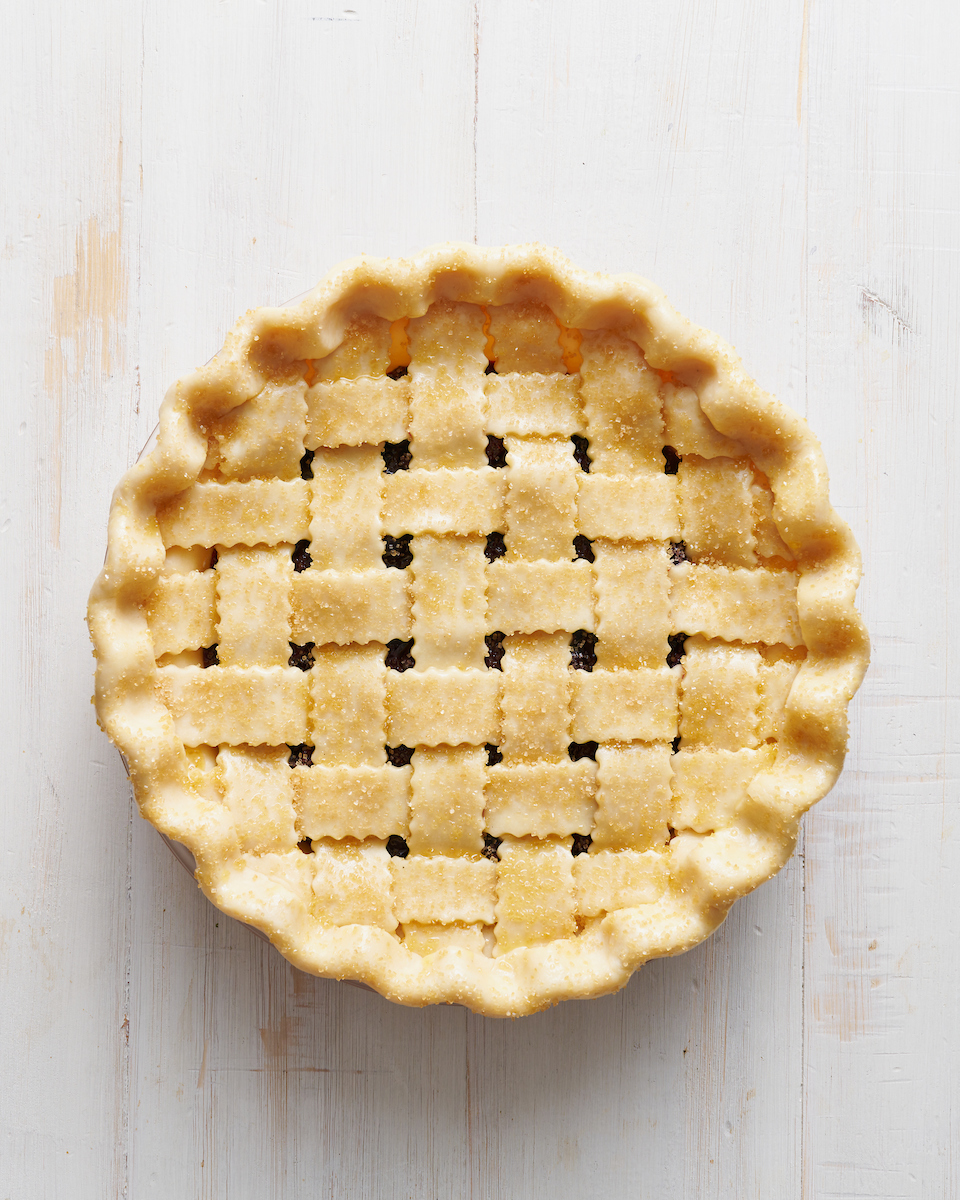
- Gently brush the edges of the crust and the lattice strips with the egg wash, then sprinkle generously with sparkling sugar.
- Place the pie on a baking sheet and bake in the lower third of the oven for 15 minutes.
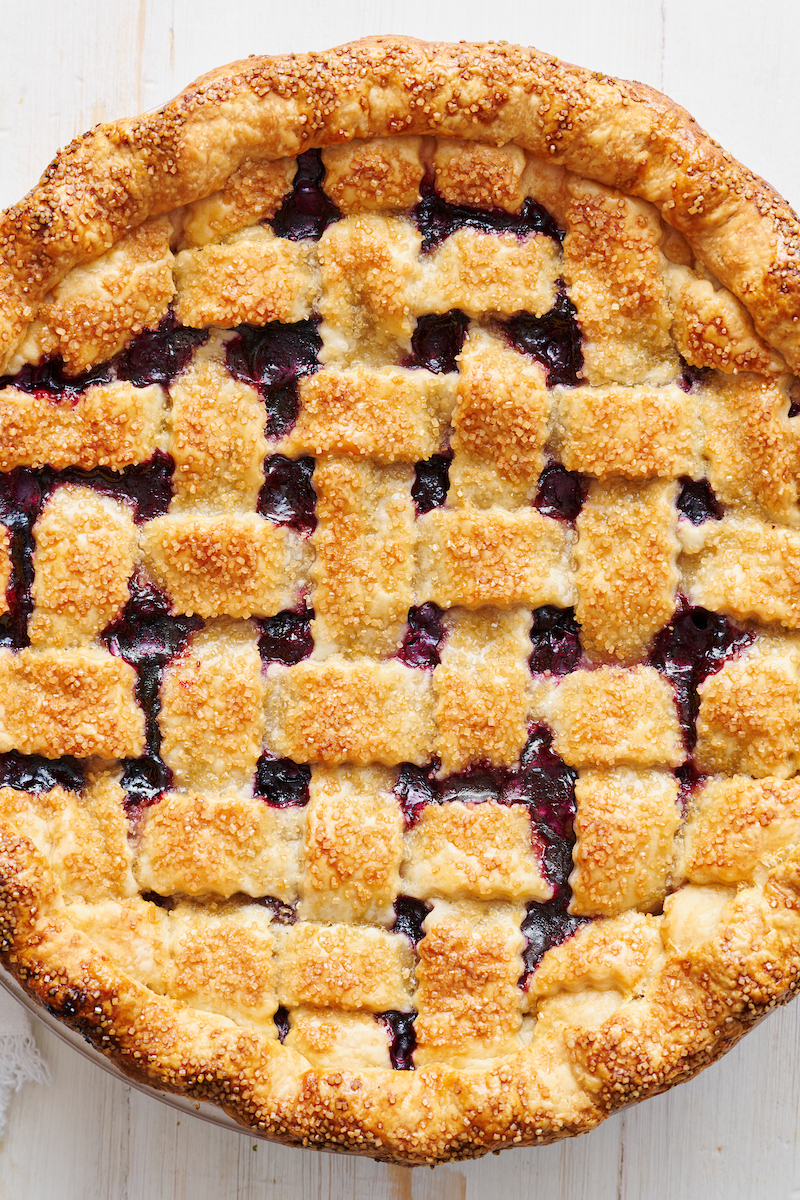
- Then reduce the oven temperature to 350 degrees (F) and continue baking for 55 more minutes, until the top crust is golden brown and the filling is bubbling.
- Place the pie plate on a wire rack and cool for 4 hours before slicing.
- Once the pie is completely cool, it may be wrapped tightly in saran wrap and stored at room temperature for up to 24 hours.
Notes
- I prefer using a metal or glass pie plate. Ceramic may take longer to bake and may yield a less flaky crust.
- If the crust appears to be getting too brown, you can add a pie crust shield or gently tent aluminum foil on top of the pie. That being said, I’ve never had to do this. As long as your oven temperature is accurate, the pie should bake evenly, and transform into a deep golden brown color.
The post Homemade Blueberry Pie appeared first on Baker by Nature.