

Tips On Storing And Preserving Vegetables For Long Time
Posted by admin on
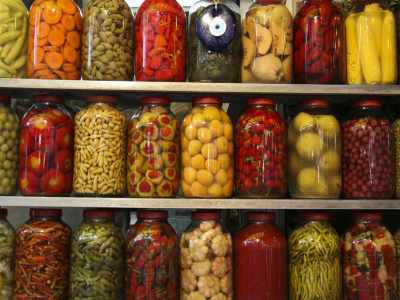
If your garden has produced a generous harvest, storing and preserving vegetables extends the bounty so you can continue to enjoy the rewards of your labor throughout the winter. There are many methods of preserving vegetables– some easy and some a bit more involved. Read on to learn the basics of a few of the most popular ways of preserving vegetable crops.
When you get a fresh, delicious vegetable from the market, it makes sense to want to cook it and use it every last bit. However, your delicious veggie might go bad before you can use it if you’re not careful.
Luckily, many techniques exist to preserve homegrown vegetables to last longer in your fridge or pantry.
REFRIGERATION
Don’t store with apples or onions; they produce gases that can cause your vegetables to rot quickly. Cold Storage is great for spinach and leafy greens, kale, broccoli and and many other cold-weather produce.
FREEZER
The freezer is a great place to store your vegetables. You can ensure they are fresh and use them later in the year when you do not have any fresh vegetables available.
- Store the vegetables in a plastic bag in the refrigerator for up to three days before freezing them.
- Freeze your vegetables in a single layer on a parchment paper-lined baking sheet
- Put individual servings of vegetables into airtight plastic, glass, or metal containers. Keep them frozen at 0 degrees F or below (32 degrees Celsius) for up to one year.
PRESERVING IN TRAYS
Freezing vegetables in ice cube trays is a great way to preserve them. In addition, you can make small amounts of stock, pureed soups and sauces, pesto and other liquids, or even freeze fresh herbs.
If you have an abundance of vegetables or fruit, you can use ice cube trays to freeze small amounts. This is helpful if you have a favorite recipe that calls for a small amount of stock or other liquid but not enough to make a whole batch. Ice cube trays are also great for freezing pureed soups, sauces, pesto, and other liquids. Finally, of course, they’re great for freezing herbs too!

COLD STORAGE (A ROOT CELLAR)
Creating a root cellar is a great way to preserve root vegetables and other preserved foods, but it’s not for everyone. It can be a great solution if you have the space and budget. But maybe you don’t have the space or money for a whole underground room!
A root cellar is a place near or adjacent to your home that’s a cool, dark place to store your vegetables in the winter. It can include an underground room or a room built into the side of your house. Most often, it’s lined with stone or brick, insulated, and has no windows or doors, so it stays dark and cool all year round.
A root cellar has drawbacks: if you live in an area with lots of humidity, mold can be a problem; they’re typically only suitable for storing root crops like carrots, potatoes, and onions, and they’re also expensive to build!
DRYING THEM (DEHYDRATING)
Dehydrating or drying food is one of the oldest methods for preserving vegetables, so you don’t have to worry about it being unsafe. In fact, drying preserves the nutrients in your veggies—so they are actually more nutritious than fresh produce!
Drying is also a great way to use leftover veggies, herbs, and fruit when in season. For example, if there’s an abundance of zucchini at your local farmer’s market right now—you can dehydrate them so they’ll last until next summer!
The easiest way to preserve fresh fruits and vegetables is using a food dehydrator. You can also dry food in the oven or in front of a fan (or outdoors). However unlikely it may sound: you can even do this at home without fancy equipment! Dehydrated foods can be rehydrated with hot water and are great for backpackers looking to travel light!
STORE IN VINEGAR
Vinegar is a liquid made from fermented alcohol. It’s an acidic liquid that can help preserve vegetables.
Vinegar is a great way to store vegetables because it protects them from mold and other harmful microorganisms but doesn’t harm the taste of your vegetables as much as salt solutions. In addition, vinegar has several health benefits! Many kinds of vinegar are made with apple cider or balsamic vinegar (which means they contain antioxidants). If you’re interested in using vinegar as an ingredient, check out this article we wrote on making your own homemade salad dressing using different vinegar!
SHORT-TERM PRESERVATION METHODS
OVEN ROASTING
Roasting them only takes a few minutes, and you can use them throughout the week.
Roasting vegetables brings out their natural sweetness and makes them easier to digest. It’s also an excellent way to make fresh vegetab.es more accessible. In addition, roasted vegetables can be used in salads, soups, stews, and more!

BLANCHING
Blanching is a method that involves placing vegetables in boiling water quickly and immediately moving them to a bowl full of ice and water to stop the cooking process. This process preserves the vegetable’s color, texture, and flavor while killing any bacteria that could make you sick if eaten.
LONG-TERM PRESERVATION METHODS
WATER BATH CANNING
Many home canners say that water bath canning is the easiest method and is a good option for beginner canners. The process involves placing the vegetables in jars and adding boiling water, vinegar, or lemon juice.
Glass mason jars are placed in a boiling water bath and processed for a required time. Then they’re cooled and sealed before storing them in your pantry.
PRESSURE CANNING (PRESSURE COOKER)
Pressure canning is another popular method used by many home gardeners. However, it requires specialized equipment (a pressure canner) and knowledge of food safety issues, so it’s not recommended for beginners new at preserving food.
QUICK PICKLING
The flavor of pickled vegetables is amazing and keeps their crunchy texture. You can use pickled vegetables in salads, sandwiches, or snacks.
The acidity of vinegar prevents bacteria from growing on your food. In addition, the salt draws out excess moisture from the food and helps prevent spoilage while keeping the flavor intact.
You can make pickles with any vegetable or fruit, including cucumbers, carrots, radishes, onions, green beans, and more!
FERMENTATION
Fermented foods are probiotics and are great for gut health. They help increase your digestive enzymes, improve your immune system, and decrease bloating.
The salt helps break down the vegetable cells and creates an environment where lactic acid bacteria can flourish (which makes them so healthy).
You can preserve vegetables by fermenting in a jar with water and salt (a brine) or add some salt directly to your vegetables if you don’t have time to make a brine.
Vegetables that work well for fermenting include cabbage, cucumber, carrots, beets, radishes, kimchi (Korean fermented vegetables), sauerkraut (German fermented vegetables), kimchi (Korean spicy pickled cabbage), or pickles.
LACTO-FERMENTATION
Lacto-fermentation is a simple and powerful method of preserving vegetables. The process involves adding salt to vegetables, allowing them to ferment for several days or weeks, and then refrigerating them. This method creates an acidic environment that inhibits the growth of harmful bacteria while preserving the nutritional value of the original vegetable.
HONEY FERMENTS
Fermented honey is made when raw honey is exposed to added moisture and warmth. It is full of beneficial bacteria and known to improve digestion. These fermented honey recipes use juices naturally present in produce to add moisture to kick off the fermenting process. The honey gets tastier, the produce gets tastier, and you get healthier!
Try Fermented Honey Garlic to boost your immune system next time you get sick or serve Fermented Cranberries at your next winter celebration.
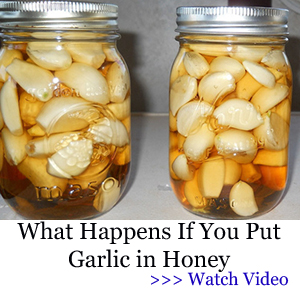
This fermented honey garlic is the perfect thing to make to boost your immune system! Both honey and garlic have strong medicinal benefits, so you’ll want to have this delicious home remedy on hand for cold and flu season.
Fermented Honey Garlic Recipe
Making fermented honey garlic is so easy, it hardly needs a recipe!
PREPARE THE GARLIC
The hardest and most time consuming part is prepping all of the garlic. Whatever size jar you use, you’ll want to fill it about 1/2-3/4 full of peeled garlic.
The quickest and easiest way to prep garlic is to place the side of a chef’s knife on top of a single clove and then give it a firm whack with the palm of your hand.
Don’t do it too hard, as you don’t want to crush the garlic, but just enough to lightly bruise the it. This will make it easy to peel, and will also release a bit of the garlic juice.
ADD THE HONEY
Once you have enough garlic in your jar, pour in some raw honey to cover it. The garlic will probably float a bit and that’s ok.
It’s important to use raw honey to make fermented garlic in honey, as it will still have all the bacteria and wild yeast that is necessary for fermentation.
When liquid is added to honey, it jump starts the fermentation process. The small amount of juice from the garlic will create just enough liquid for fermentation to happen.
COVER AND FLIP
Cover the jar loosely with a lid to let the gasses escape, and put it in a dark place to ferment.
It’s a good idea to put a plate or something similar underneath the jar as it’s fermenting, as it will likely bubble up a bit and a little. It’s also important to gently turn the jar over every day or so, or whenever you think about it, to make sure that all of the garlic stay coated with honey.
Screw the lid on tightly before you do this! Then return it to it’s upright position and re-loosen the lid.
In a few days to a week you will notice some bubbles forming on the surface of the honey. Hooray!
The honey garlic will ferment for about a month, but you can eat it at any time during the process.
The flavor will continue to develop over time, the garlic will mellow, and the honey will become much runnier.
Occasionally the garlic cloves turn a blue or green color due to a reaction during the fermentation process. While it may be a bit alarming, it is not harmful and the honey garlic can still be used.
Honey garlic will store well in a cool place for many months, or even a year or longer! I’ve kept some for over two years and it is still good.
USING FERMENTED HONEY GARLIC
Now, how do you use this fermented honey garlic? That’s a good question, and it can be used in a variety of ways.
Both garlic and honey have strong medicinal properties, so it makes sense to use it as an immune booster or if you feel a cold or flu coming on.
Pop a whole garlic clove, or take a spoonful of honey (or both!).
As you can probably imagine, honey garlic also makes a wonderful food!
It’s a natural in marinades and sauces, and would make a really tasty glaze for meats or veggies. Basically anything where you would normally use honey and garlic together!
VACUUM SEALING
If you’re looking to save money on your grocery bill by buying vegetables in bulk, vacuum sealing them is an excellent way to keep them fresh. You can get a vacuum sealer for under $100 these days, and they come with loads of different attachments that make it an easy option to keep everything from fruits and vegetables to meat, fish, and cheese fresh. Here’s how it works:
Place your food in the bag you want to seal. Remove air by pressing down on the top of the bag until all air bubbles are gone or using a handheld pump that sucks out all the air from both sides of your bag (this will take some practice).
If you’re unsure if there’s enough space left for liquid expansion—and who wants an exploding jar of preserved tomatoes?—you might want to squeeze out another ounce or two before sealing up the baggie completely.
Apply pressure evenly across every inch of your sealed package using at least two hands, holding it firmly together so no leaks occur during the storage process (this will prevent any unwanted moisture buildup).
SALT BRINE
Salt brine preserving/fermentation is a simple process that you can use to store vegetables for months. Of course, you’ll need some basic kitchen equipment and ingredients, but these skills are instrumental in your back pocket when looking for ways to preserve vegetables.
As the name suggests, this method involves using salt and water to preserve produce.
Salt brine preserves vegetables by inhibiting the growth of microorganisms that cause food spoilage, as well as any bacteria that might be present in your food. The salt concentration in the brine solution will help kill most microorganisms within 24 hours of exposure.
This method works best with fresh vegetables and fruits, although it’s possible to preserve things like jams and jellies using salt brine preservation/fermentation techniques. After processing, you’ll need to ensure plenty of nutrients are left in your fruit or vegetable so it can still ferment properly!
BOTTLING IN OIL (OR VINEGAR)
Bottling in oil (or vinegar) is another great way to preserve your veggies. It works especially well with cucumbers, green beans, hot peppers, tomatoes, and other summer fruits or vegetables that don’t have much natural juice content on their own—make sure not to use too much salt when preparing them before bottling!
BRINING (PICKLE-BRINE)
Pickling is another common way to preserve vegetables. The process involves submerging vegetables in a salty solution (known as a “brine”) for several hours or days, which creates an environment too acidic for harmful bacteria but perfect for preserving the nutrition of your veggies without compromising their flavor.
SPROUTING (MICROGREENS)
The last method we’ll cover here is sprouting—soaking seeds overnight before planting them in the soil so they can germinate faster than usual. Sprouts are incredibly beneficial for health because they contain vitamins and minerals!
It’s important to remember that the best way to preserve your vegetables is by using home food preservation techniques that work best for you and your family. The more you know how to do this, the more likely you will be to keep a steady supply of fresh food year-round!
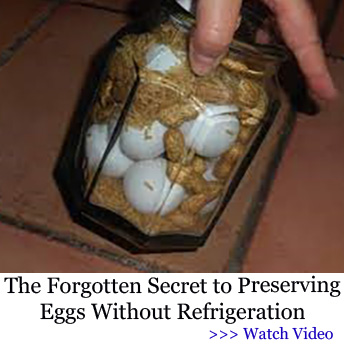
Info about building and managing your root cellar, plus printable plans. The book on building and using root cellars – The Complete Root Cellar Book.
This book takes a fresh look at the art, science and romance of building and stocking a root cellar. There are detailed, illustrated construction guides for making four different kinds of root cellars that are functional and attractive. These include never-before-seen models for apartment and condo dwellers and home owners without a basement.
The Complete Root Cellar Book provides technical information on using photovoltaics (solar cells) and other energy technologies to enhance a root cellar’s performance and ecological sustainability. It also includes must-know information on how to choose, store and manage a supply of fruits, vegetables, nuts and preserves.

Books can be your best pre-collapse investment.
Carnivore’s Bible (is a wellknown meat processor providing custom meat processing services locally andacross the state of Montana and more. Whether your needs are for domestic meator wild game meat processing)
The Lost Book of Remedies PDF ( contains a series of medicinal andherbal recipes to make home made remedies from medicinal plants and herbs.Chromic diseases and maladies can be overcome by taking the remediesoutlined in this book. The writer claims that his grandfather was taughtherbalism and healing whilst in active service during world war twoand that he has treated many soldiers with his home made cures. )
Easy Cellar(Info about building and managing your root cellar, plus printable plans. The book on building and using root cellars – The Complete Root Cellar Book.)
The Lost Ways (Learn the long forgotten secrets that helped our forefathers survive famines,wars,economic crisis and anything else life threw at them)
LOST WAYS 2 ( Wordof the day: Prepare! And do it the old fashion way, like our fore-fathers did it and succeed longbefore us,because what lies ahead of us will require all the help we can get. Watch this video and learn the 3 skills that ensured our ancestors survival in hard times offamine and war.)
The post Tips On Storing And Preserving Vegetables For Long Time appeared first on PrepperFortress.